This tutotial will show in a few steps, how to install MySQL Server 5.6 on Ubuntu.
Run the above command on your terminal:
sudo apt-get install mysql-server-5.6
You may be asked to install extra packages, type y to confirm:
Reading package lists... Done
Building dependency tree
Reading state information... Done
The following extra packages will be installed:
  libaio1 libdbd-mysql-perl libdbi-perl libhtml-template-perl libmysqlclient18
  libterm-readkey-perl mysql-client-5.6 mysql-client-core-5.6 mysql-common
  mysql-common-5.6 mysql-server-core-5.6
Suggested packages:
  libclone-perl libmldbm-perl libnet-daemon-perl libplrpc-perl
  libsql-statement-perl libipc-sharedcache-perl mailx tinyca
The following NEW packages will be installed:
  libaio1 libdbd-mysql-perl libdbi-perl libhtml-template-perl libmysqlclient18
  libterm-readkey-perl mysql-client-5.6 mysql-client-core-5.6 mysql-common
  mysql-common-5.6 mysql-server-5.6 mysql-server-core-5.6
0 upgraded, 12 newly installed, 0 to remove and 99 not upgraded.
Need to get 609 kB/21.5 MB of archives.
After this operation, 165 MB of additional disk space will be used.
Do you want to continue? [Y/n] y
Then, you will be prompted to type a password for the root user:
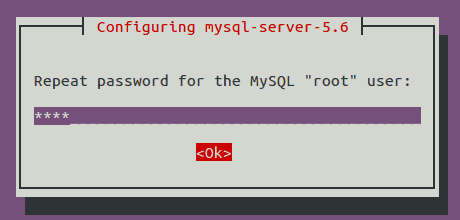
Confirm your password:
Well done! By intalling MySQL from the above steps, all the settings needed to auto initialize your server at system startup are already set.
Still on terminal, let’s connect to MySQL using the root user and the password we defined in the earlier steps:
mysql -u root -p
Enter password:
Then, you will be presented with the welcome message of MySQL Server:
Welcome to the MySQL monitor.  Commands end with ; or \g.
Your MySQL connection id is 44
Server version: 5.6.19-0ubuntu0.14.04.1 (Ubuntu)

Copyright (c) 2000, 2014, Oracle and/or its affiliates. All rights reserved.

Oracle is a registered trademark of Oracle Corporation and/or its
affiliates. Other names may be trademarks of their respective
owners.

Type 'help;' or '\h' for help. Type '\c' to clear the current input statement.

mysql>
Let’s do our first query to make sure that everything worked as expected:
mysql> select version();
+-------------------------+
| version()               |
+-------------------------+
| 5.6.19-0ubuntu0.14.04.1 |
+-------------------------+
1 row in set (0.00 sec)
Hope it helps. Cya!
This guide will show you how to create a Python function decorator with a few…
This guide will show you how to fix the error Got permission denied while trying…
This guide will show you how to create a Python virtual environment on Intellij IDEA…
This tutorial will quickly show you how to to find and kill processes on Linux,…
This guide shows a possible solution for Python error Relocation R_X86_64_PC32 against symbol can not…
I condensed below a cheat sheet of Kubernetes useful commands. I will keep updating this…
View Comments