Last Updated on 11/11/2020
This tutorial will guide you through Gradle build tool installation and environment variables setup on Windows and Ubuntu.
This tutorial assumes that you already have JDK installed on your machine, if not, install it by following the steps in this quick tutorial before moving on.
Windows
Installation
Follow this link on Gradle download section, then click on gradle-x-x-x-bin.zip (binaries only) download link. Unzip the downloaded .zip file on your computer.
Environment Variables
Open the environment variables settings window by pressing Windows + Pause/Break or through Control Panel -> System -> Advanced system settings ->Environment Variables.
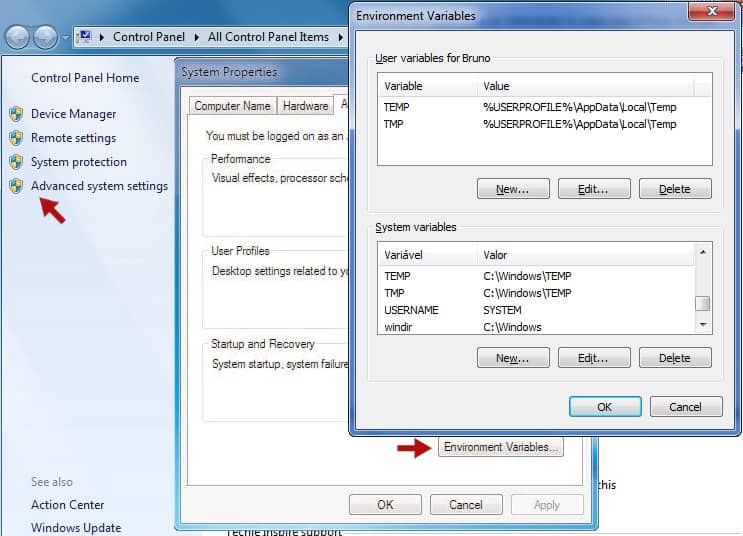
Click on New… button on System environment variables and add the variables below:
| Variable Name | Variable Value |
|---|---|
| GRADLE_HOME | Path where you extracted Gradle from zip file. Example: C:\gradle-2.2.1 |
| PATH | It already exists on your system under the name Path. Edit its value by adding the following at the end: %GRADLE_HOME%\bin; |
Validating
Validate Gradle installation by opening the Command Prompt and typing the command below. If Gradle was successfully installed, it may print information about Gradle version:
gradle -v
Output:
------------------------------------------------------------
Gradle 2.2.1
------------------------------------------------------------

Build time:   2014-11-24 09:45:35 UTC
Build number: none
Revision:     6fcb59c06f43a4e6b1bcb401f7686a8601a1fb4a

Groovy:       2.3.6
Ant:          Apache Ant(TM) version 1.9.3 compiled on December 23 2013
JVM:          1.8.0_20 (Oracle Corporation 25.20-b23)
OS:           Windows 7 6.1 amd64
Ubuntu
Installation
In Ubuntu terminal, add the repository where Gradle can be found for installing and update the packages list:
sudo add-apt-repository ppa:cwchien/gradle
sudo apt-get update
Next, find the most recent Gradle version for installing:
sudo apt-cache search gradle
The command above will print a list with all the available Gradle versions, in this case (it may vary according to the date that you’re reading this tutorial), version 2.2.1 is the most recent:
gradle-doc - Documentation for gradle
libgradle-core-java - Groovy based build system - Core library
libgradle-plugins-java - Groovy based build system - All plugins
missidentify - a program to find win32 applications
gradle - Gradle is a Groovy based build system
gradle-ppa - Gradle is a Groovy based build system
gradle-1.10 - Gradle is a Groovy based build system
gradle-1.11 - Gradle is a Groovy based build system
gradle-1.12 - Gradle is a Groovy based build system
gradle-2.0 - Gradle is a Groovy based build system
gradle-2.1 - Gradle is a Groovy based build system
gradle-2.2 - Gradle is a Groovy based build system
gradle-2.2.1 - Gradle is a Groovy based build system
Install Gradle:
sudo apt-get install gradle-2.2.1
Environment Variables and Validation
The installation through the above steps often already automatically performs the necessary settings for enabling Gradle on Ubuntu, so, let’s validate the installation with the following command:
gradle -v
Output:
------------------------------------------------------------
Gradle 2.2.1
------------------------------------------------------------

Build time:   2014-11-24 09:45:35 UTC
Build number: none
Revision:     6fcb59c06f43a4e6b1bcb401f7686a8601a1fb4a

Groovy:       2.3.6
Ant:          Apache Ant(TM) version 1.9.3 compiled on December 23 2013
JVM:          1.8.0_25 (Oracle Corporation 25.25-b02)
OS:           Linux 3.13.0-36-generic amd64
Hope it helps. Cya!
Great guide, thank you.
I’m glad to hear that!
really helpful…. 🙂
I’m glad to hear that.