Last Updated on 11/11/2020
This tutorial will show how to add datasource to Wildfly, making use of the Postgres database.
Pre-requisites
- Wildfly – click here to follow to tutorial.
- Wildfly management user – click here to follow to tutorial.
Driver
Wildfly needs a driver in order to connect to a database, also, this driver needs to be the same type of the database being connected, Postgres in this case.
Download
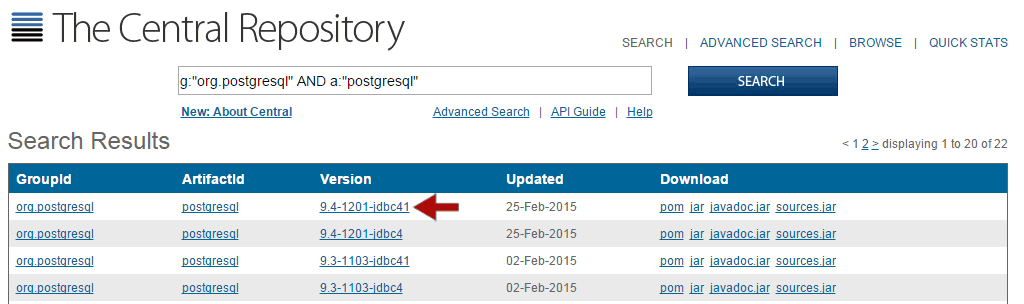
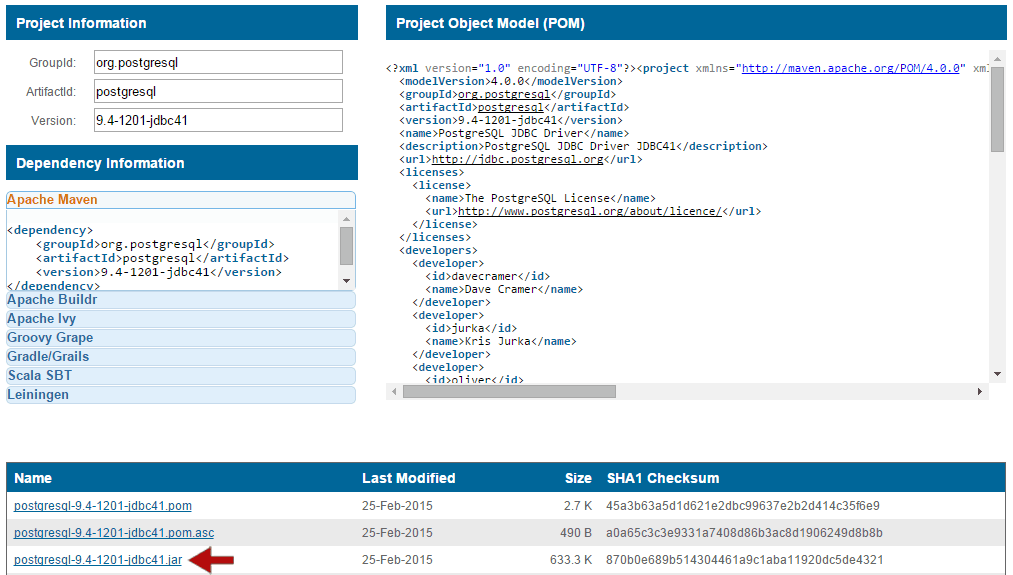
The driver is a common .jar file. Follow this link from Maven repository and pick the most recent driver version to show its information. On the new window, download the jar file as the images below:
Then, create a folder named drivers in the opt directory and move the jar to the new directory:
sudo mkdir /opt/drivers
sudo mv postgresql-9.4-1200-jdbc41.jar /opt/drivers/
Installation
With Wildfly running, we are going to access its command line interface to install the downloaded driver, therefore, go to the bin directory of your Wildfly and connect to cli:
cd /opt/wildfly-8.2.0.Final/bin
./jboss-cli.sh --connect
Now that you are connected to the command line, we are going to add a module to Wildfly which will point to the downloaded jar file:
module add --name=org.postgres --resources=/opt/drivers/postgresql-9.4-1200-jdbc41.jar --dependencies=javax.api,javax.transaction.api
To finish this step, we are going to install the driver on Wildfly:
/subsystem=datasources/jdbc-driver=postgres:add(driver-name="postgres",driver-module-name="org.postgres",driver-class-name=org.postgresql.Driver)
You should see a success message if everything went well:
{"outcome" => "success"}
Datasource
With the properly installed driver, make sure that your Wildfly is running go to its administration console on http://localhost:9990/console/App.html and type your username and password.
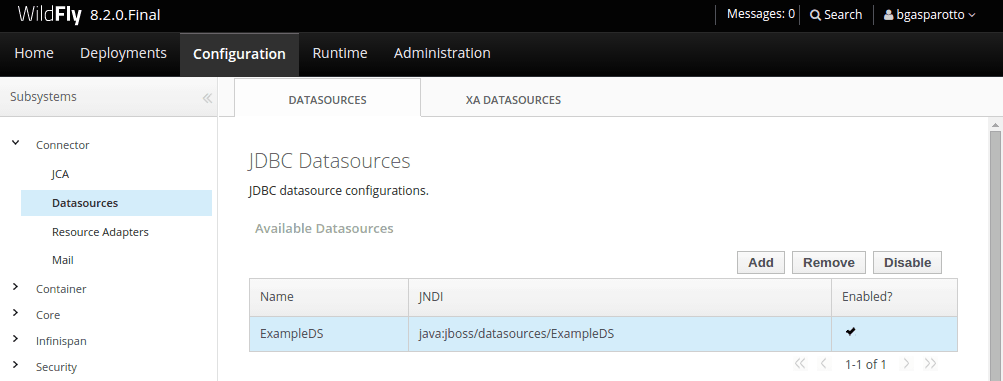
On the Configuration tab, select the Connector -> Datasources category, then, the Datasources sub-tab and click on Add:
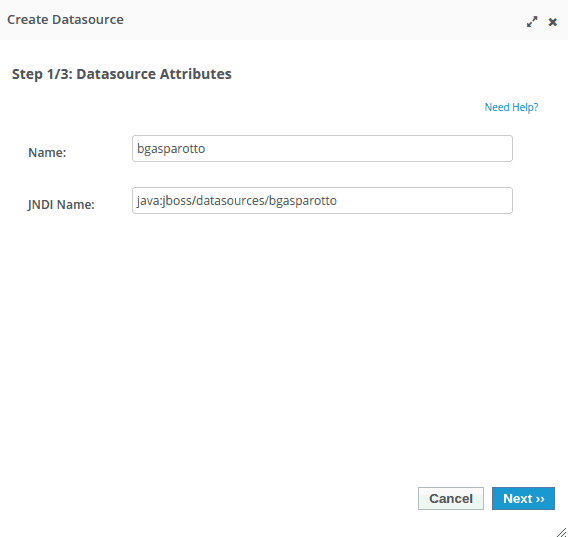
In the first step you will choose a name to identify your connection by the Name field, then in JNDI Name, you will choose the name that will be used for your Java applications to find your connection, usually specified in your persistence.xml. For this example, we will use the name bgasparotto followed by java:jboss/datasources/bgasparotto as the JNDI name:
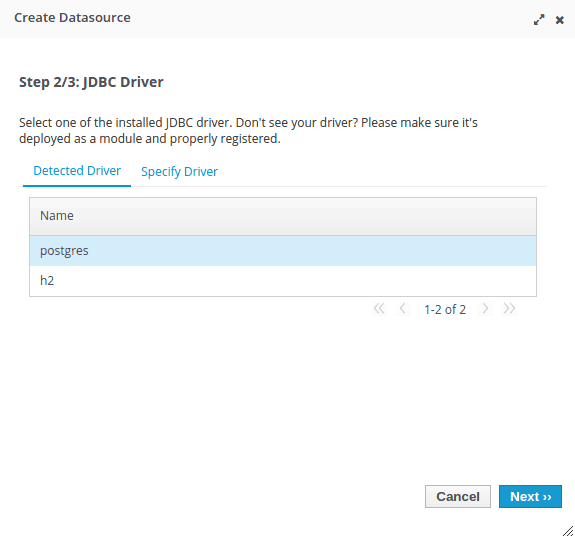
Then, we need to choose which driver we want this connection to use. Select the previously created Postgres driver:
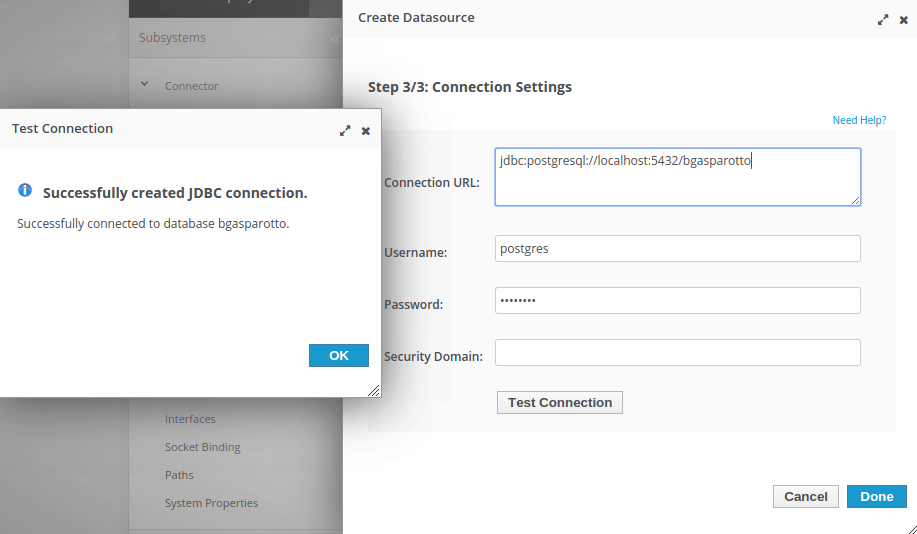
In the last step, we must provide the database information that this datasource will connect to.
Na última etapa, devemos informar os dados de acesso ao banco de dados que este datasource irá se conectar. Make sure to create and start the desired database in your Postgres, and fill the form your database credentials. The Connection URL field should be filled following the pattern jdbc:postgresql://<ip:port>/database_name.
After filling the form, click on Test Connection to confirm that it worked, and finally click on Done:
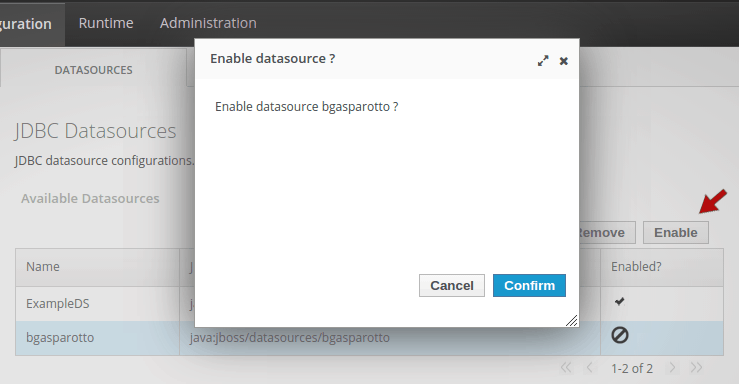
Your new datasource will be displayed but it remains disabled. Select it and click on Enable:
Now your new datasource is ready to be used for your Java applications deployed on your Wildfly.
Hope it helps. Cya!
total newbie here:
after following these steps, what else do i have to do in my eclipse project to connect to the datasource?
Hi ossi!
People often make use of a datasource in conjunction with JPA, obtaining an
EntityManagerwith the configuration declared on yourpersistence.xml file. This way, the EntityManager interacts with the persistence context to save your data on database.Too much theory? I’ll write a post about that in a while, but the following link has a project I’m developing where it all works together. Feel free to explore and ask as many questions you need.
https://github.com/bgasparotto/archproject