Last Updated on 16/11/2020
For years I have been managing my JDK all by myself, for instance, you’ll find a good amount of tutorials in this blog on how to install Java or making a portable JDK for making it easier to switch versions. It works quite well but we no longer need to do any of that manually, we can use SDKMAN!.
What is SDKMAN!?
According to their official description:
SDKMAN! is a tool for managing parallel versions of multiple Software Development Kits on most Unix based systems. […]
That means that in practice you can have multiple versions of Java installed, of which you can easily switch with one command and the tool will make sure that all of your environment variables are properly exported.
Moreover, SDKMAN! isn’t limited only to Java, it supports an extensive list of SDKs including but not limited to Gradle, Groovy, Kotlin, sbt, Scala and Spark.
Why do we need it?
Working on different projects simultaneously, with the addition of the increasing adoption of microservices and the new Java release cadence, it’s common to need different versions of the language and the tools around it. So the easier it is to switch everything, the better.
How to install SDKMAN!?
The official website is well covered by tutorials, but in short, you first install the command line API:
curl -s "https://get.sdkman.io" | bash
source "$HOME/.sdkman/bin/sdkman-init.sh"
and then validate it with:
sdk version
which should yield the installed version.
How to use SDKMAN!?
Typing sdk help is a good way of discovering what the tool offers.
Installing an SDK
But since we love Java, that’s how you list all the available versions of it:
sdk list java
Which will print an extensive list of JDKs from different vendors, take note of an identifier of your choice:
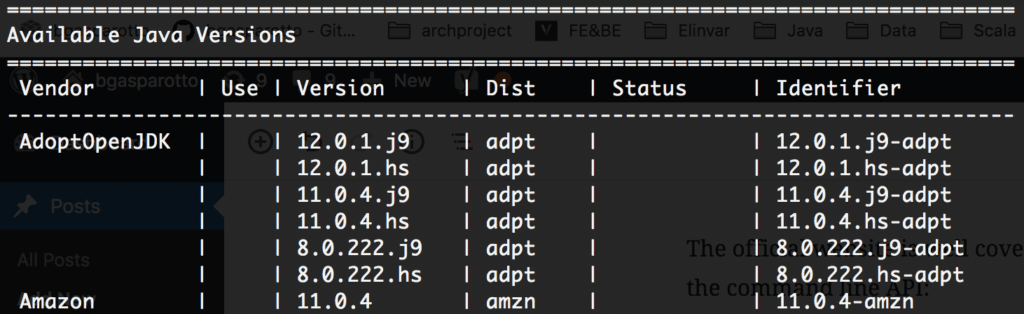
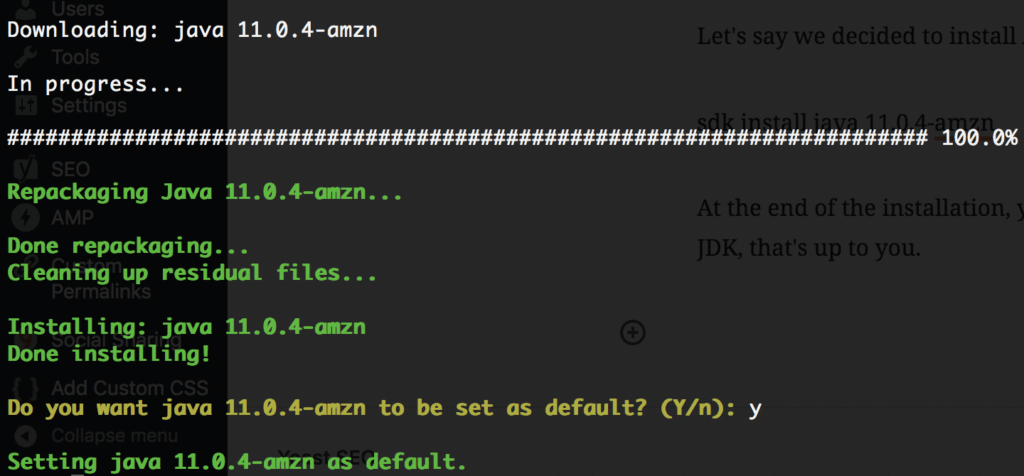
Let’s say we decided to install Amazon’s 11.0.4-amzn, now we do:
sdk install java 11.0.4-amzn
At the end of the installation, you will be prompted to set it as your default JDK, that’s up to you.
To verify that it worked, just check the javac version as usual:
~ javac -version
javac 11.0.4
Switching between SDK versions
You can install as many versions as you like and simply switch between them like the following:
sdk use java 8.0.212-amz
And now you have Java 8 for your older projects:
~ javac -version
javac 1.8.0_212
For more details, please visit the usage tutorials.
Happy coding =]