Last Updated on 15/11/2020
This tutorial will show you how to install CentOS 7 and properly divide your disk space among all the necessary partitions. Since the process is quite long, I will try to not write much but provide lots of screenshots to make things more visual and less error-prone.
Download CentOS 7
Visit this link to download the DVD ISO of the latest CentOS version. The download may take a while since the file is a bit bigger than 4GB, so it’s the perfect time to pour some coffee =].

Install CentOS 7
I will skip ahead assuming you figured out how to boot the downloaded ISO on your machine. If you are going to install CentOS 7 in a virtual machine like VirtualBox, select the Red Hat version:
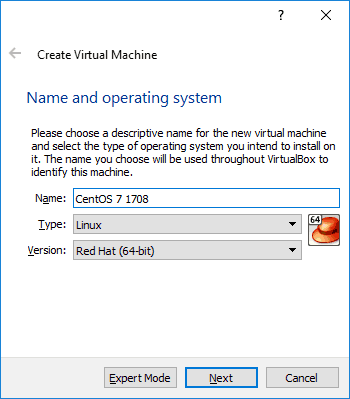
On the other hand, if you are willing to install it directly on your host machine, create a bootable Linux USB drive with the downloaded ISO. On either way, boot your system to start the process.
Initial setup
On the first screen, select Install CentOS 7 then press Enter:

The operational system is going to load some resources, wait until you are presented with the welcome and language selection screen:


Select your language and hit Continue in the right bottom of the screen:

Installation summary
Now, you are going to be presented with the screen below, where we are going to modify some necessary options before the installation begins:

Localization > Date & Time
Even though I choose UK English as my language, I’m currently in Brazil so I am going to change my localisation to get the right timezone. Change these settings at your will:
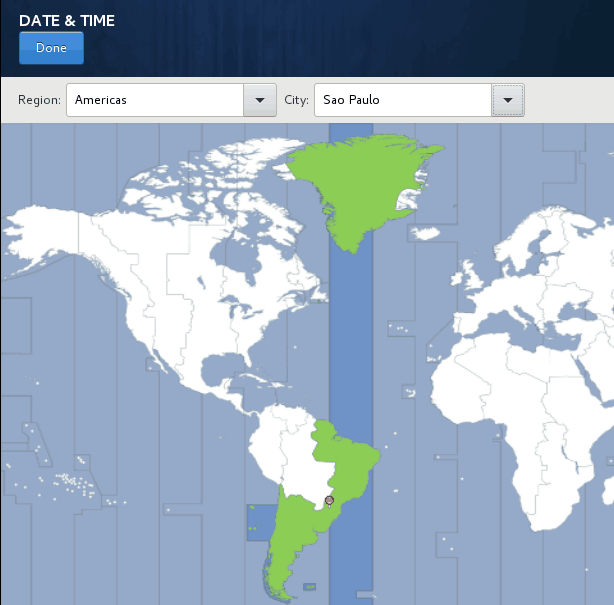
Always remember to click on Done to apply your changes.
Localization > Keyboard
I’m going to change the keyboard layout in order to get the current layout for my Brazilian keyboard. If you have any sort of English keyboard, these changes are probably unnecessary.
First, click on the plus sign and add the desired layout:

Now, move it above the previous existing keyboard layout. Use the text field on the right to test your new setup:

Software > Software selection
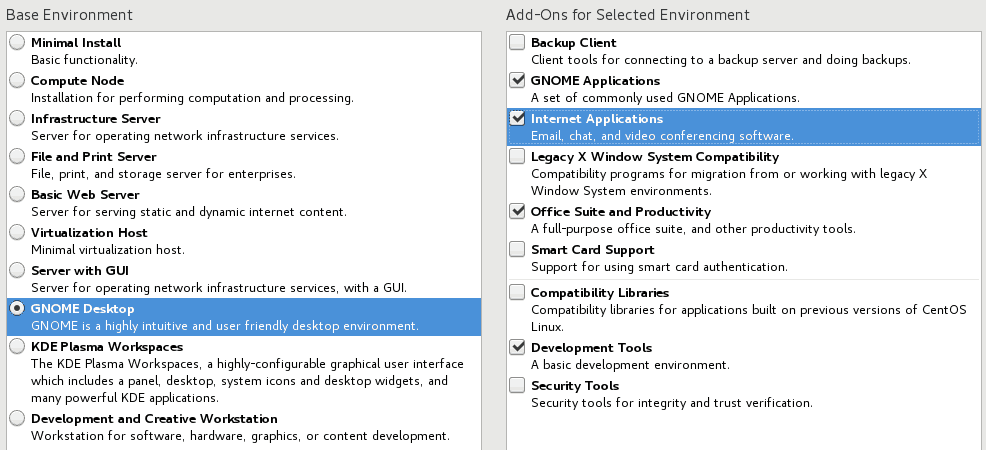
Now we are going to select which type of CentOS we are about to install. This step relies on whether you are installing it on a server without a video output, your personal computer, etc. For the sake of this tutorial, I will choose a setup for using on my personal computer with a GUI, multimedia and development resources.
Choose the following options like the image below:
System > Installation destination
This is a very important step where we are going to configure partitions manually. In order to do so, select I will configure partitioning to be taken to the next screen.

Four partitions have to be created, the name and label, size, mount point, type, and file system should be distributed like the following:
| Partition | Mount Point | Type | File System | Size |
|---|---|---|---|---|
| boot | /boot | Standard | ext4 | 512 MB |
| root | / | Standard | ext4 | 10 GB ~ 20 GB |
| home | /home | Standard | ext4 | 5 GB ~ max available |
| swap | - | Standard | swap | 2 GB |
The following setup is for a 20 GB hard drive. If you have a bigger hard drive like 100 GB, give 20 GB to the root partition, the default size for the others and all of the remaining to the home partition.
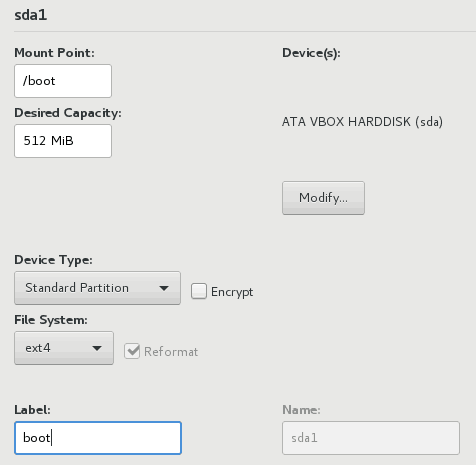
Boot
Click on the plus sign to add a new mount point for the boot partition:

Then edit the remaining information like the following:
Root
Click on the plus sign again to add a new mount point for the root partition:
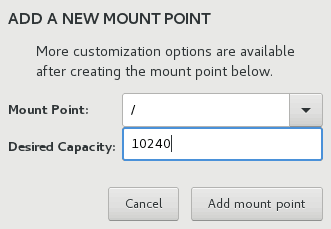
Then edit the remaining information:

Home
Click on the plus sign once again to add a new mount point for the home partition:

Then edit the remaining information:

Swap
Click on the plus sign to add a new mount point for the swap partition:
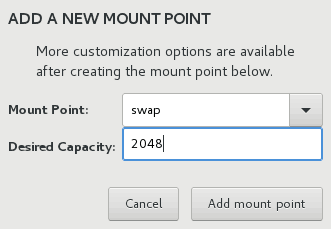
Then edit the remaining information:

Next, hit Done and a screen will appear showing the changes that are going to be made on your disk, just hit Accept Changes to return to the main screen.
System > Network & hostname
In this step, everything you have to do is to enabled by default the network adapter, so it gets enabled automatically when CentOS starts:

Begin instalation
Finally hit the Begin Installation button to start the process. Whilst the system gets installed, don’t forget to set the root password and create a user to log into the system:

After a while, the process will finish and you should see the screen below that shows everything worked as expected. Hit the Reboot and enjoy CentOS 7.

Hope it helps.
Cya!